

Outline of the Article:
Introduction to GitHub
- What is GitHub?
- Importance of GitHub for web development.
Understanding HTML Deployment on GitHub Pages
- Explanation of static websites.
- Benefits of deploying HTML websites on GitHub Pages.
Creating a GitHub Repository
- Step-by-step guide to creating a repository.
Uploading HTML Files to the Repository
- Methods to upload HTML files to GitHub.
Setting Up GitHub Pages (2026 Settings Path)
- Enabling GitHub Pages for the repository via the Actions-based deployment flow.
Custom Domains and HTTPS
- Configuring a custom domain with a CNAME file.
Troubleshooting and Common Issues
- Addressing potential problems during deployment, including checking the Actions tab.
Best Practices for HTML Deployment
- Tips and suggestions for effective deployment.
Advantages of GitHub Pages Deployment
- Highlighting the advantages for web developers.
Conclusion
How to Deploy an HTML Website on GitHub (2026 Guide)

In the digital world, showcasing your work through a website is vital, and GitHub provides an excellent platform for hosting static projects, including websites built with plain HTML. Deploying an HTML website on GitHub is still one of the fastest ways to get a project online for free — and in 2026, the process is even more streamlined, with GitHub Pages now running every deployment through GitHub Actions behind the scenes, even for simple branch-based sites.
Introduction to GitHub
GitHub remains the leading platform for version control and collaboration in software development. Beyond its core Git functionality, it offers GitHub Pages — a built-in way to host static web content directly from a repository. The platform's simplicity, free HTTPS, and global CDN make it an ideal choice for deploying HTML-based projects, portfolios, and documentation sites.
Understanding HTML Deployment on GitHub Pages
Static websites, built with HTML, CSS, and JavaScript, need no backend server or database. Deploying one on GitHub Pages gives you a public URL, automatic HTTPS, and CDN-backed hosting with zero server configuration. Every time you push a change to your chosen branch, GitHub automatically rebuilds and redeploys your site.
Creating a GitHub Repository
To begin, you'll need a repository to hold your website files:
Step 1: Log in to your GitHub account and click on the '+' icon in the top-right corner to create a new repository.

Step 2: Name your repository — for a personal site tied to your username (e.g. yourusername.github.io), the repo name must match exactly. For a project site, any repo name works and the URL will include the repo name as a subpath.

Step 3: Choose the visibility option — public or private — as per your preference. Note: GitHub Pages on private repos requires a paid plan for organizations, but works free on personal accounts.

Step 4: Initialize the repository with a README file, or leave it empty if you already have local files ready to push.
Uploading HTML Files to the Repository
Once your repository exists, upload your files either through the GitHub web interface (drag and drop, or "Add file > Upload files") or via Git commands in your terminal:
git init
git add .
git commit -m "Initial commit"
git branch -M main
git remote add origin https://github.com/yourusername/your-repo.git
git push -u origin main
Make sure your homepage file is named index.html and sits in the root of the repository (or in a /docs folder if you prefer that structure) — GitHub Pages looks for this file specifically.
Setting Up GitHub Pages
Enabling GitHub Pages in 2026 is still simple, though the settings panel has been refined:
Step 1: Open your repository and click the Settings tab.

Step 2: In the left sidebar, click Pages under the "Code and automation" section, then under "Build and deployment," set Source to "Deploy from a branch."
Step 3: Use the branch dropdown to select main (or whichever branch holds your site).

Step 4: Choose the folder — usually / (root), or /docs if that's where your files live.
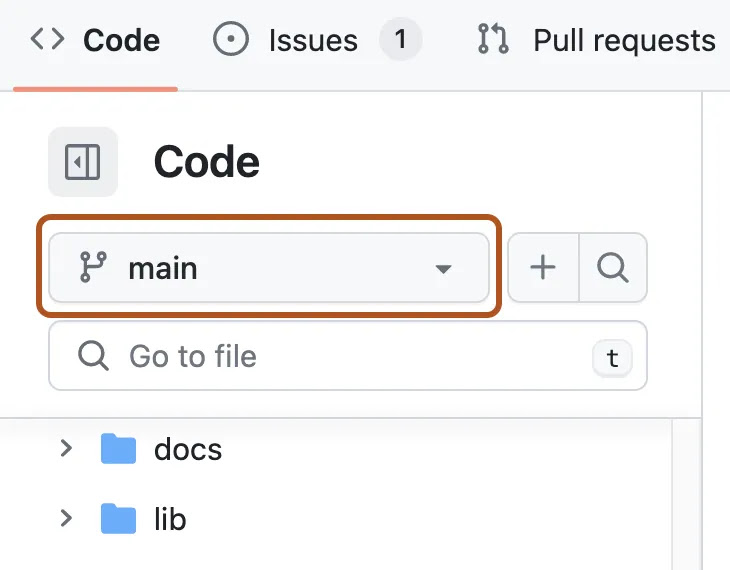
Step 5: Click Save.

GitHub now triggers a deployment automatically using a built-in GitHub Actions workflow — even though you selected "branch" deployment, Pages always runs through Actions under the hood now. Check the Actions tab to watch the deployment run: a yellow dot means it's building, a green checkmark means your site is live. Your URL will appear at the top of the Pages settings once deployment finishes.
Custom Domains and HTTPS
GitHub Pages gives every site a free github.io subdomain and automatic HTTPS. If you want your own domain instead:
- Add a
CNAMEfile to your repository root containing your custom domain (e.g.www.yoursite.com). - Point your domain's DNS records to GitHub's Pages servers (an A record for an apex domain, or a CNAME record for a subdomain — GitHub's Pages settings page shows the exact values to use).
- Back in Settings > Pages, enter your custom domain and enable "Enforce HTTPS" once the certificate provisions (this usually takes a few minutes, occasionally longer).
Note: adding a CNAME file doesn't automatically enable or remove a custom domain — the domain must also be set in the repository's Pages settings for it to take effect.
Troubleshooting and Common Issues
If your site doesn't appear right away, check these common culprits:
- Missing or misplaced
index.html— it must be in the root of the selected folder, not nested inside a subfolder. - Wrong branch or folder selected — double check the Source settings match where your files actually live.
- Deployment still running — check the Actions tab; builds can take a minute or two, especially the first time.
- Cached old version — try a hard refresh or open the site in a private/incognito window.
- Case-sensitive paths — GitHub Pages servers are case-sensitive, unlike some local setups, so double-check file and folder name casing.
Best Practices for HTML Deployment
To keep your deployed site fast and maintainable:
- Optimize and compress images before committing them.
- Keep a clean, consistent file and folder structure.
- Use responsive design (flexible layouts, media queries) so your site works well on all devices.
- Add a
.nojekyllfile in the root if your project doesn't use Jekyll and has files/folders starting with an underscore, which Jekyll would otherwise ignore. - For projects with a build step (React, Vue, Hugo, etc.), use a GitHub Actions workflow to build and deploy automatically, rather than committing built files manually.
Advantages of GitHub Pages Deployment
Deploying HTML websites on GitHub Pages offers several advantages: free hosting with no server management, built-in version control, easy collaboration through pull requests, automatic HTTPS and CDN delivery, and a straightforward way to showcase your projects to a global audience.
Conclusion
Deploying an HTML website on GitHub Pages remains one of the most accessible and efficient ways to publish your work. With automatic Actions-based deployments, free HTTPS, and simple custom domain support, developers can go from a local HTML file to a live, shareable website in just a few minutes.


